Sunday, October 19, 2014

Weekend Pledge

Now, I promised I would do something, and I did--and I made sure to take pictures.

My project of choice: Buttaflies.

Last seen as: 


So, I began with the background of the bottom wings. 

As per "protocol", I outlined the shape in my favorite when it comes to shading edges: split stitch (note: the stem stitch I used here is made with the needle splitting the previous stitch from above by going down into the fabric instead of coming up and splitting it from the bottom)


And, as far as I can remember, this was my progress at the end of Saturday:

(please forgive the horizontal lines, I couldn't figure out how to get rid of them post-picture-taking and my light wasn't cooperating)


Now, come Sunday I started a little earlier and finished the whole dark orange section in (for me) record time.


And, about an hour ago, I finished!:


My patience was seriously tested when trying to go around those little circle thingies.
But, done!

^_^

Saturday, October 18, 2014

Saturday...

After spending approximately an entire week staring at GIMP (photo editing program) and Inkscape (vector image program), trying to make stuff for my Society6 page, I have decided to take today and do a little textile work.

Now, I haven't done any yet... but I'm going to look over my previous posts, see which project needs a little TLC and go from there. 

Time will tell if it works.

^_^

P.S. Check out my Society6 page, I've uploaded some of my mom's photos and they look awesome! 

P.P.S. What do you think of the new background?

Sunday, October 12, 2014

Arrowhead Stitch Tutorial

If you tuned into some of my last posts, you'll remember a "brief" mention of a certain "Arrowhead" stitch.

If memory serves, this is my first embroidery stitch tutorial--so bear with me.

The example you'll see below is actually a part of Doodleplex. I'm using this tutorial to add a little miscellaneous embellishment to mix things up.


Let us begin:

First, make a long stitch (or line of long stitches, depending on how big the shape is and if the center line is straight/curved) down the center of the area you want to fill.
In this case, that would be a McGyvered flower/leaf thing near the edge of Doodleplex Part II:


Next, you make two stitches at the "bottom" of your shape, for as long as you can go while following the outline. Sink the needle either in the same hole as the first big stich or underneath the thread as close to the hole as possible. In this case, because the leaf I'm trying to fill has such an elongated shape, my stitches are long compared to the shape of the leaf:

(please forgive the horrible picture, I couldn't get my camera to cooperate)


Afterwards, keep filling in the shape with stitches parallel to those bottom two stitches. Your stitches should start at the outline (or slightly outside of the outline depending on preference/desired effect), and end under that big stitch down the center.


And just continue that way until you get as far as you want.


If you want an arrow like finish, just keep stitching until you're sinking stitches at the very end of that long stitch. If you want a rounded finish (as seen here), adjust the angle and the length of your stitches when you get to the rounded portion of your shape.


Out of curiosity, I tried stitching a leaf the opposite way. Parallel stitches first, and then the long stitch down the center.

First off, I made a mistake and made my bottom stitches waaaaay too long, so if it looks funny there's a 95% chance it was due to an error on my part.


Other than that, I'd say the effect was very similar if not the same. So, whichever works for you should turn out just fine.


^_^

Wednesday, October 8, 2014

Bad Blogging and a Curious, Deceptively Unproductive Few Days

(note the caps in the post title)

I've been a bad blogger.
I do apologize for a certain lack of postage...

However, I am here to say that I've been working on stuff--and I have pictures of the stuff! 

They're just still on my camera.

My latest project, however, is not of the textile nature.

I've been dabbling in graphic design--as such I would love to announce that it would absolutely give me the giggles if you:


^_^

Also, please check out the new addition to my sidebar!

Sunday, September 28, 2014

Doodleplex must NOT be forgotten.

However, I am sad to admit that I often do forget not so little 'ol Doodleplex...

But, here you can see the beginning of the last "round" of Doodleplex Part II:

Actually, now that I think about it it's the end of the "second to last" chunk of Doodleplex Part II.
I did jump the gun a little, though, and thread the three colors I want to use for the "tree"... who knows if I'll be able to use it this stitch session, though.

Here's a shot of the first stitches!


Anywho, the main chunk of this post is dedicated to the purpose of me complaining about my bizarrely sudden struggles with the fishbone stitch in the "leaves" above the flower.

In case you don't recall (and I'd be surprised and impressed if you did recall), I've already had some practice with fishbone stitch back in Doodleplex Part I:


and:


I was positive it would work the same here, but it wasn't until I started in on it that I realized that the shape of the "leaves" I was trying to fill were gonna be an issue.

And I went through a few different versions of stitches until I finally seemed to get a hang of this one specific stitch that I came up with one the spot. I haven't seen said stitch before, so I'll just go ahead and coin it.

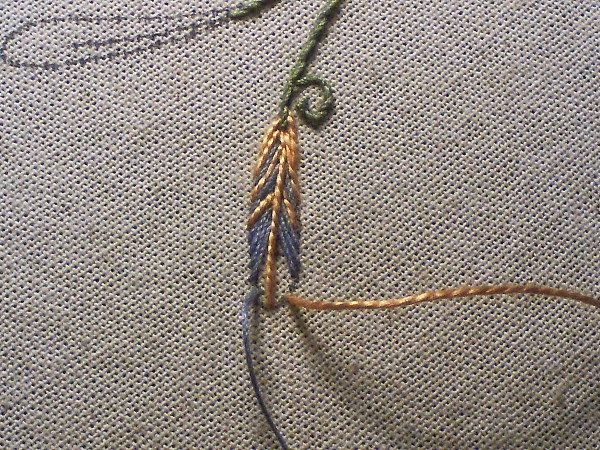
I call it: Arrowhead stitch (displayed here in the green-yellow leaf).


Note: it's called the arrowhead stitch because of the "theoretical" appearance. Though, so far it looks like a feather or fluffy bunny tail (center leaf).


Why Arrowhead? Well, there's already a feather stitch, and "Arrowhead" sounds more epic than "fluffy bunny tail stitch"

Anywho...since I'd already threaded some thread for the "tree", I didn't exactly finish all of these leaves.

I did get to use that tree thread though.

Therefore, at the end of a marathon stitching session, I give you:


Tutorial on Arrowhead coming soon! ( © Karla Barraza)

^_^

Saturday, September 27, 2014

Ideas for the Future?

I was trolling Pinterest (as per usual when my head's a little too active for me to relax) when I came across this pin that caught my eye:

(clicking on the image should theoretically open the link)

Follow Rent a Stylist http://www.pinterest.com/rentastylist/ Giambattista Valli | Spring 2014 Couture Collection |

For some reason, the colors stood out to me. I'm thinking of trying them on...a flower...a butterfly?

Not sure yet, but at least I have a color scheme!

^_^

Tuesday, September 23, 2014

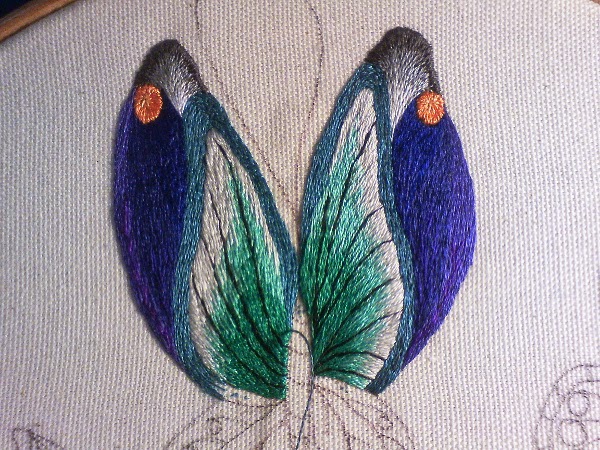
Top wings... done! (Almost)

Save a minor detail and an issue with the order in which layers have to be stitched, I'm essentially done with the top wings! 

To compare, let me begin with the last update seen on Lace (making) Adventures:


Approximately half of that second wing is done, as you can see. 

Now this past weekend, I had promised myself that I'd get back to embroidering after a crazy few weeks. However, come Saturday, I found myself doing nothing. 
However, Sunday, I put my foot down and picked up my embroidery hoop.


^_^